
Note: There is a video version of Using the Zone System with Polaroid SX-70 Film, Part 1 at the bottom of this post.
In Part 1, I explained the theory behind the Zone System, how I thought it might benefit today’s serious SX-70 photographer and I painstakingly outlined my process for taking the photos required to make a Zone Ruler. If you haven’t, I recommend you take a look at Part 1 before continuing with Part 2.
In Part 2, I analyze my set of “towel photos” taken with Polaroid Color 600 film, build a Zone Ruler, provide some practical tips for using the Zone Ruler in your own SX-70 photography and show a number of photos I’ve taken over the last six-plus months using my Zone Ruler.
Laying out my collection of six towel pictures side-by-side reveals the range of gradations possible with Polaroid Color 600 film.

My Zone V photo is a near match to an 18% grey card. From there, the gradations change rather dramatically. In particular, there is a sharp jump in tone to the lighter Zone VI. It still shows textural detail in the white towel but, by Zone VII, highlight detail is all but gone. It is an indication that highlights need to be carefully measured to maintain detail.
Moving to the darker Zones, Zone IV shows a good level of texture in the towel. Zone III is near-black but there is still some semblance of towel texture visible. Zone II is a deep, textureless black. This range from Zone IV to Zone II shows that the Polaroid film is maintaining a reasonable gradation of shadows, much more than in the highlights.
Ansel Adams assigned values to each of the zones that related to typical photographic subjects. In his book, Polaroid Land Photography, he described the zone descriptions for Polaroid 52 black and white peel-apart print film as follows:
| Zone I | Solid black |
| Zone II | First step above solid black |
| Zone III | First “texture” |
| Zone IV | Average shadow value |
| Zone V | Middle grey—18% grey card value |
| Zone VI | Average skin reflectance (36%) |
| Zone VI½ | High skin value |
| Zone VII | Quite high value—reduced texture |
| Zone VII½ | Usual textural limit |
| Zone VIII | Just below pure white |
| Zone VIII½ | Pure white |
The problem, of course, is that Polaroid black and white print films—all of which are long out of production—typically had a much longer tonal range than SX-70 integral film. Adams acknowledges this in the 1976 edition of his book, noting that the textural range of SX-70 film is limited to Zone III½ to Zone VI whereas a Polaroid 52 peel-apart print managed a range from Zone II to Zone VII½.
Adams doesn’t provide zone descriptions for SX-70 film. In fact, I have not seen any examples anywhere that adapt the Zone System to the unique tonal characteristics of SX-70 film. Therein lies the value of my project: the first-ever zone system scale designed for the current 2021 crop of Polaroid Color 600 Film.

There is a link to a freely downloadable pdf version of my Zone Ruler down below.
For the final Zone Ruler, I’ve desaturated each photo to eliminate the distracting colour casts. The annotations merge Adams’ own annotations for other films, such as Polaroid 52 film mentioned earlier, with my own findings for Polaroid 600 film, based on an examination of the towel photos as well as six-plus months of photography using my Zone System ruler.
Adams (and I) use the term Zone VI½, Zone III½ and so on because one zone actually represents a range of tones that span 1 EV. In practice, tones don’t jump in discrete steps as shown in a Zone Ruler; tones change in a continuous gradation from dark to light. For example, if Zone VI was set at f/11, Zone VII would be f/8 and Zone VI ½ would be in between the two, about f/8½. On the zone ruler, a half-zone occurs at the border line between two zones.
This is where the recommended zone sticker on the Spotmeter V’s exposure scale (see Part 1) is helpful; it shows each zone as spanning a full EV, allowing me to visually place a subject tone, for example, in the middle of Zone VI, at the ‘top’ of the zone (Zone VI ½) or at the ‘bottom of the zone (Zone V ½). Given the limited range of highlight tones SX-70 film is capable of resolving, the ability to distinguish half-zones is important.

Technically, zone rulers should be created for each film type since each has its own unique sensitometric characteristics. For conventional film, such as Kodak Tri-X and Ilford FP-4, the differences could be sufficiently significant to warrant this approach. However, with current Polaroid integral films, any differences are largely lost or unnoticeable, given how variable the effective film speed and colour cast can be from film pack to film pack. There is a general lack of consistency in the product, compared to conventional film stocks.
In my tests with Polaroid SX-70 and 600 films, including black and white and colour versions, I’ve found that my Polaroid 600 scale works well with all. So feel free to give my Zone Ruler a try, regardless of which Polaroid integral film type is in your camera.
The Zone Ruler in Practice
The application of the zone system to SX-70 photography has its limitations:
- There is no way to adjust contrast through negative development or darkroom manipulation.
- Current SX-70 integral films do not have a reliable, consistent film speed—it can vary ± ⅓ EV, meaning there could be a potential difference of up to ⅔ EV between two packs of film.
- While the MiNT 670SLR-S camera admirably allows the adjustment of shutter speeds, it is in full EV steps. The ability to change exposure in ½ EV steps would be helpful. That is not the fault of MiNT. Rather, it is the nature of the original SX-70 camera, which has a ‘fixed’ f/8 aperture. A camera that has a user-adjustable aperture would allow changes in ½ or ⅓ stop intervals.
Despite those limitations, it is still possible to pre-visualize how an SX-70 picture will appear before the shutter is pressed. Understanding what is important in a photographic subject—an important detail in the shadows, a luminous highlight, a bright colour, a skin tone, and so on— and being able to place those tones where you want them within the limited spectrum of SX-70 film tones is a significant advantage of the zone system.
I started my zone system experiments back in January 2021 and, over the last six-plus months, I have consistently used the zone system along with my MiNT 670SLR-S and Spotmeter V to pre-visualize my exposures. Here’s what I’ve discovered:
In general, I like to place my highlights as bright as possible, pushing them to Zone VI ½ or VII. At Zone VII, highlights can appear washed out so, if there are large areas of detailed highlights, I find it best to keep them in the Zone VI range. If there are just small highlight areas, I might push them to Zone VII.
I also take exposure readings of light and dark shadows and important midtones and will sometimes make adjustments to my exposure based on where they fall on the zone scale and how important they are to the final photo.
I like to carry a small grey card in my bag and will occasionally take an additional meter reading of it, making sure it is in the same light that is hitting the subject. This allows me to double check my pre-visualized exposure setting for the subject.
Another good use of the grey card is to check the effective film speed of a new pack of film. After loading a pack, I take a meter reading off the grey card, set my shutter speed accordingly, take a picture of the grey card and, after it has developed for fifteen minutes, compare it to the actual grey card . Based on the results, I might change the ISO on my meter up or down a ½ EV for that pack of film.
Realizing that my placed exposure might be optimistic (i.e., too bright), I usually take a second photo one shutter speed higher (-1 EV), darkening the highlights and possibly turning shadows black.
This strategy works quite well. Generally, my pre-visualized exposure works out but I also have an alternative darker version, just in case. I can confidently take my photos, stash them in a pocket and move on, without having to wait 15 minutes to confirm that at least one turned out the way I expected it to.
Photo Examples
Here are a few examples of how I have applied the zone system to the pre-visualization of my SX-70 photos.


This low contrast winter photo (left) is well suited to the limited dynamic range of SX-70 film. I wanted the blue chair to be light and lively so I placed the blues in Zone VI. This put the very white snow in Zone VII½. I knew this would not retain any detail but that was okay; it was more important to maintain a bright luminous white. This photo worked out on my first try. The second photo (right), taken at one shutter speed higher (-1 EV), is much too dark.


In another photo, also taken earlier this year, I placed the yellow graffiti in Zone VI. The deepest black graffiti fell in Zone II½, a nice solid black. In this case my hunch was off; in the first photo (left) taken at 1/250 second, the yellows lacked the saturation I was after. My second photo (right) taken at 1/500 (-1 EV) was better. On this cold outing, it was important to take the two photos and quickly get them into my warm underarm pouch to develop. However, I was confident that, once I got home to examine them, one would be a good exposure


This contrasty alleyway photo challenges the limited range of the film. I placed the bright sunlit brick wall in Zone VI½. I wanted to catch just enough detail to convey that it was brick while holding as much shadow detail as possible in the mid-shadow areas at the right side of the photo, which fell in Zone III. The deep shadows fell at about Zone II, which was fine. The first photo (left) turned out, much as I had pre-visualized. The second (right) at -1 EV was too dark.


This window sill photo was taken in an extremely contrasty situation. I set up an LED studio light to fill the deep interior shadows. The awning on the Airstream trailer model was placed at Zone VI½, knowing that this would barely convey the blue stripes on the awning. The LED light was adjusted so that the window sill behind the Shinkansen (bullet) train model would fall in Zone III. The first photo (left) was okay but the train highlights were blown out. The second photo (right) at -1 EV shows more detail in the Airstream awning and the train but the shadows are far too dark. If I were to improve the picture, I would add a lot more fill light. Or accept that an SX-70 is not the best camera for this extreme lighting scenario.


Here’s another window sill subject with extremely high contrast. It was important to convey the transparency of the blue glass ball so I placed the globe’s brighter highlights at Zone VI. The sunlit wood in the foreground fell at Zone VI½, still retaining some detail and the shadows fell at Zone III½ with the help of a fill light. As it turned out, my first exposure at 1/250s (left) turned out as I pre-visualized. My second exposure (right) at 1/500s (-1 EV) was way too dark.
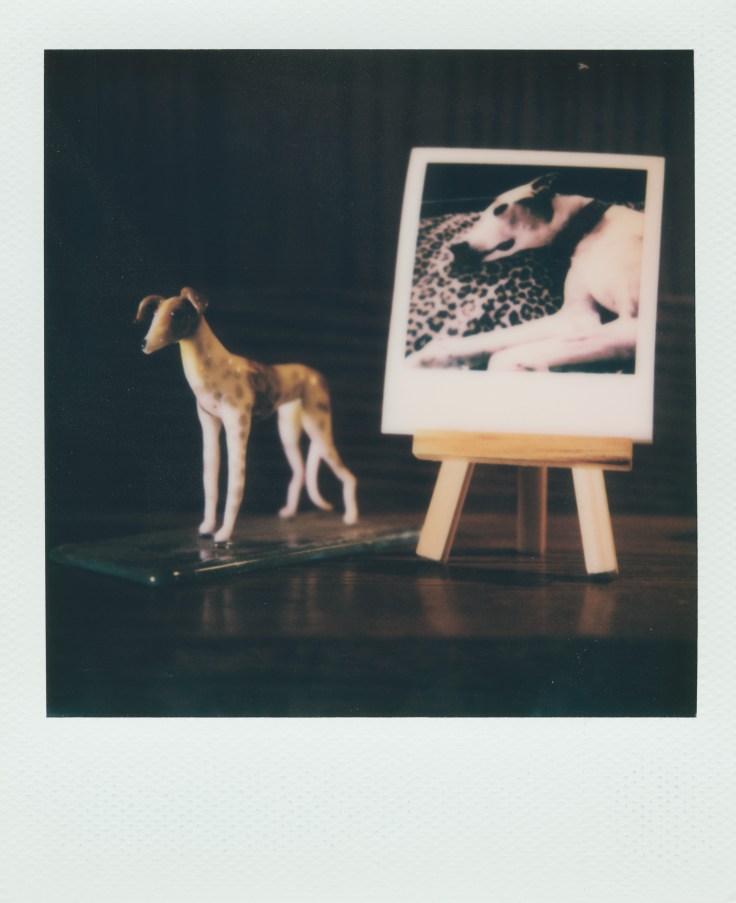

This photo includes a custom glass figurine of our greyhound, Styxx, and a Polaroid headshot of the handsome guy. Both were set on the dark wood mantle of our fireplace. In this case, I didn’t use a fill light. I relied on light from a window far to the left. It was most important to convey the translucent tones in the glass figurine, which were placed at zone VI½. I allowed the white SX-70 frame go white and the wood black. Remarkably, the ¼ second exposure (left) worked well, holding the delicate tones in the glass as I pre-visualized. Although the dark wood tones are near black, they still retain some detail. My second photo (right) taken at -1 EV is too dark and loses the sense of transparency in the glass figurine.


I wanted to capture the bright white bark on this cluster of aspens, which I placed in Zone VI. The scene was largely in shade, and my exposure (left) was based on that lighting, but it was clear that the bright sky area in the background would be blown out. The second photo at -1 EV took care of that problem but the white tree bark and green foliage were way too dark.


This driftwood stump projecting into a lake is a light beige but with a lot of detail that I wanted to convey. I placed it in Zone VI. The first photo (left) captured the detail of the driftwood but, overall, the photo was a bit dark and didn’t convey the setting as I pre-visualized. I was at this location long enough for the photo to develop and decided to rephotograph it at +1 EV. It definitely lightened the scene, a bit too much though. This is a case where the ability to make an in-between exposure at +½ EV would have been ideal.


Taken at the same location, I had a similar problem with this clump of driftwood on a sandy beach. With the driftwood placed at zone VI½, my first photo (left), taken at 1/1000s, was a bit too dark and my second photo at 1/500s (+1 EV) was a bit light.
In the end, my favourites are the lighter versions of both these driftwood photos. They have the lively ethereal quality I prefer for my SX-70 photographs.

My final photo is of a cluster of black-eyed susans. It was important to get the yellows just right, which I figured was about zone V½. The exposure would be 1/1000s. But I wasn’t absolutely sure; deciding the best zone for a yellow petal is trickier than the determining the best zone for a white—at least for this photographer. So I pulled out my little grey card, held it in the same light hitting my subject and took a reading from it. This confirmed my 1/1000s exposure time. The yellows turned out as I wished on the first shot.
Is it worth it?
In short, yes. As Ansel Adams would say, understanding how SX-70 film interprets the tones in a subject, and how the photographer can use that knowledge to shape the look of a photograph, is extremely valuable. Arguably, the Zone System is even more valuable for SX-70 photography than it is for conventional film photography. With film, I can use the Zone System to produce the best possible negative, knowing that I still have many more methods to improve the final photographic print in the darkroom. With SX-70 film, getting the exposure right using the Zone System is the only option I have to produce the best possible image.
Resources
Be sure to look at Part One of Using the Zone System with Polaroid SX-70 Film. There is a complete list of reference texts, equipment and supplies at the bottom of the post.
You can download a copy of my Zone Ruler here.
Leave a Reply